How to configure the appearance of your newsletter articles
Configuring content for an article section
Overview
In order to engage your audience it’s important that the design of your articles represents your brand and displays your content in a compelling way.
This guide explains how you can:
- Add content sources for an article section
- Select a layout
- Style the section
- Style the articles
Adding an article block
To add an article block to your newsletter header navigate to Settings > Campaigns > Campaign Name > Content and click on the ‘Body’ tab.
Then click ‘+ Add’ and select ‘Articles’.
Configuring content for an article section
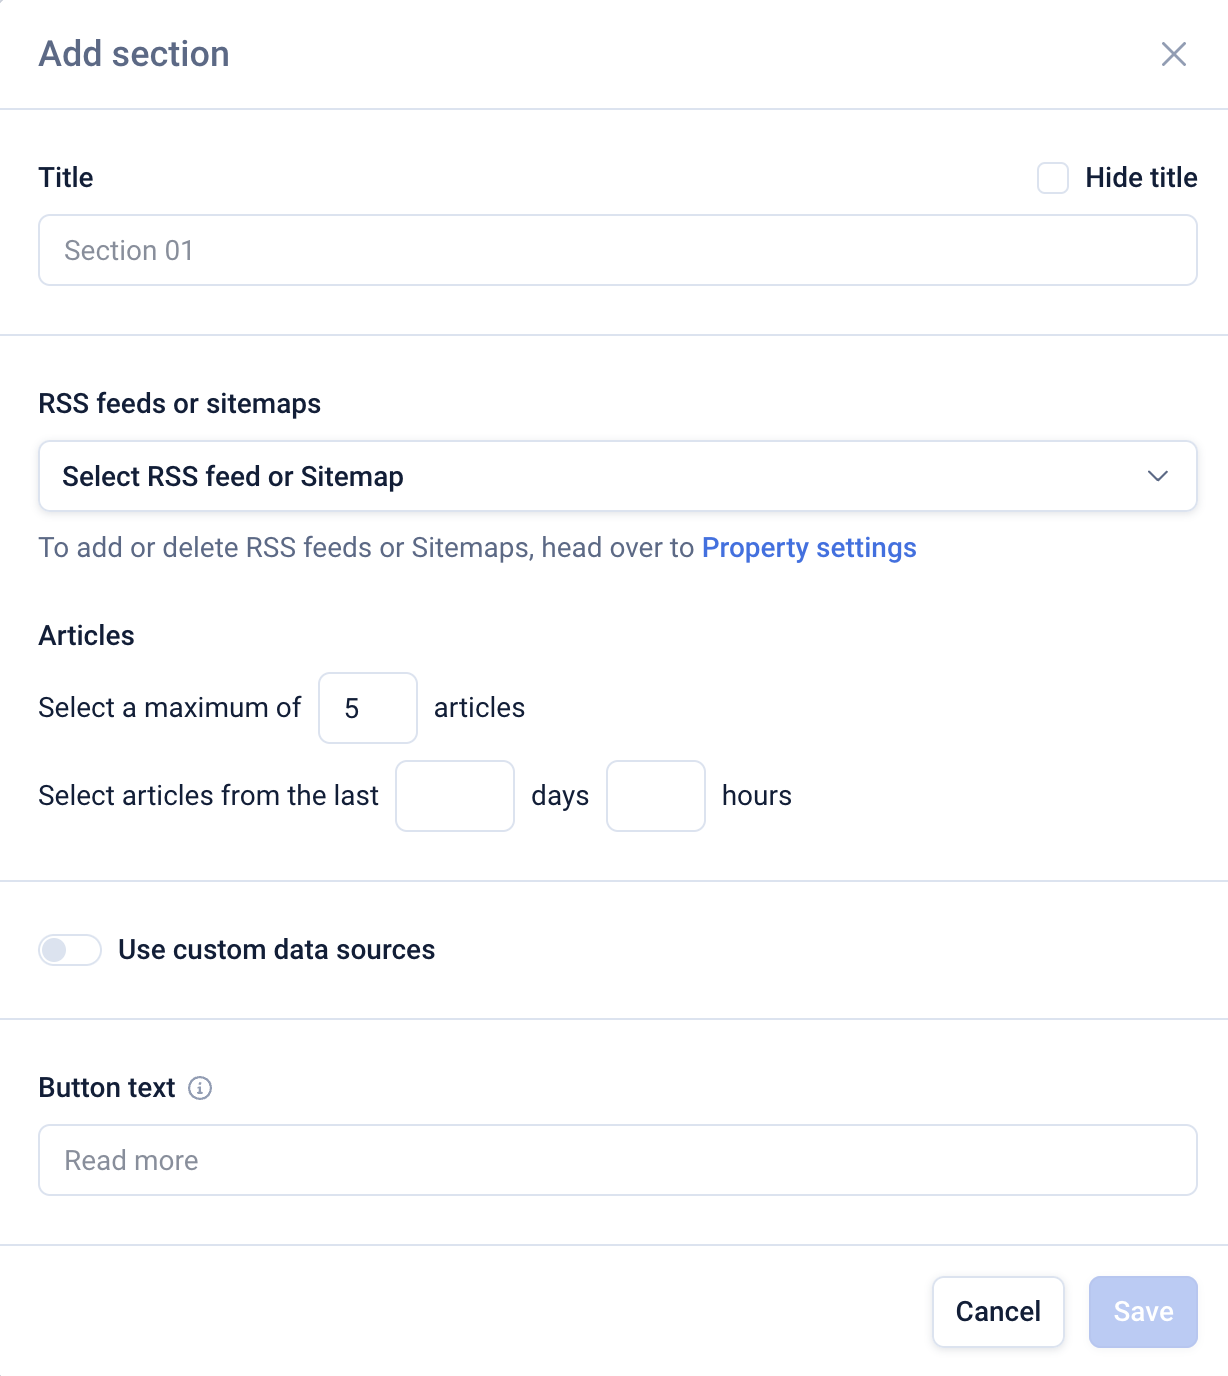
To add content to the article block, click on the 3-dot menu and select ‘Content’.
Add a section title, select one or more RSS feeds or sitemaps and specify the number of articles and the time period.
Then optionally add button text (this can also be hidden later), and click ‘Save’.
Selecting your article layout
To apply an article layout for your section click the 3-dot menu and select ‘Article Layout’.
Choose a layout from the available options. You can toggle off the ‘Show first article as a hero article’ if you do not wish to display a hero layout for the first article in the section.
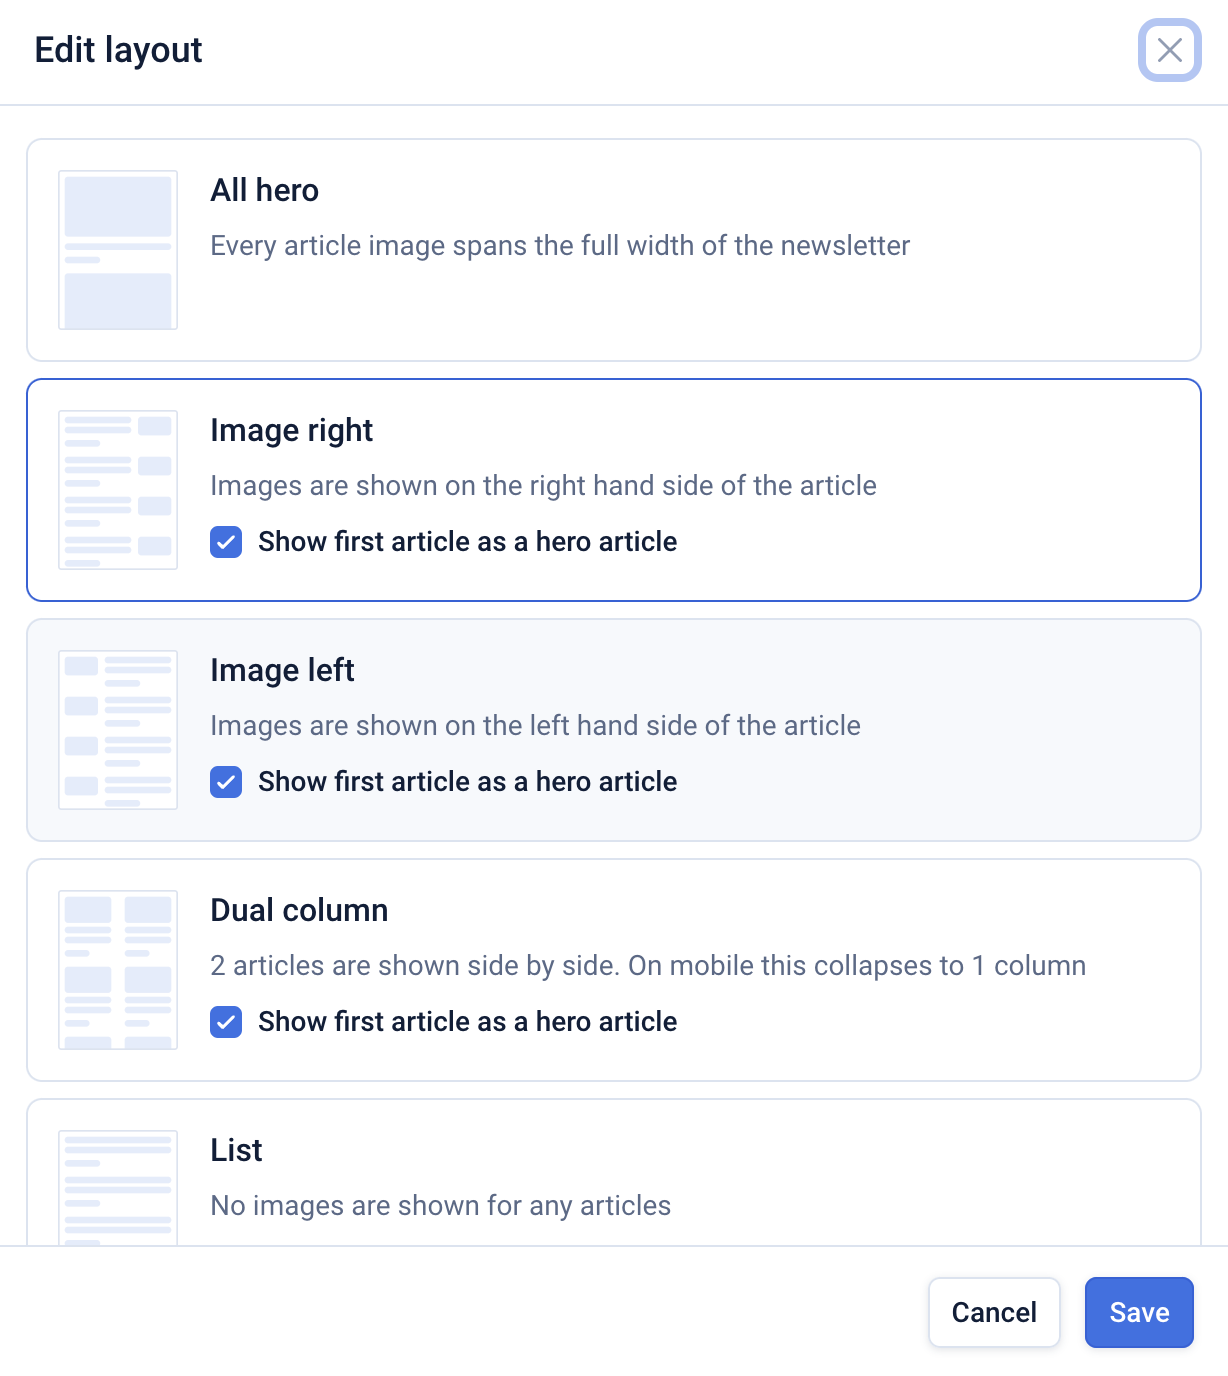
See more details on layouts here.
Styling the article section
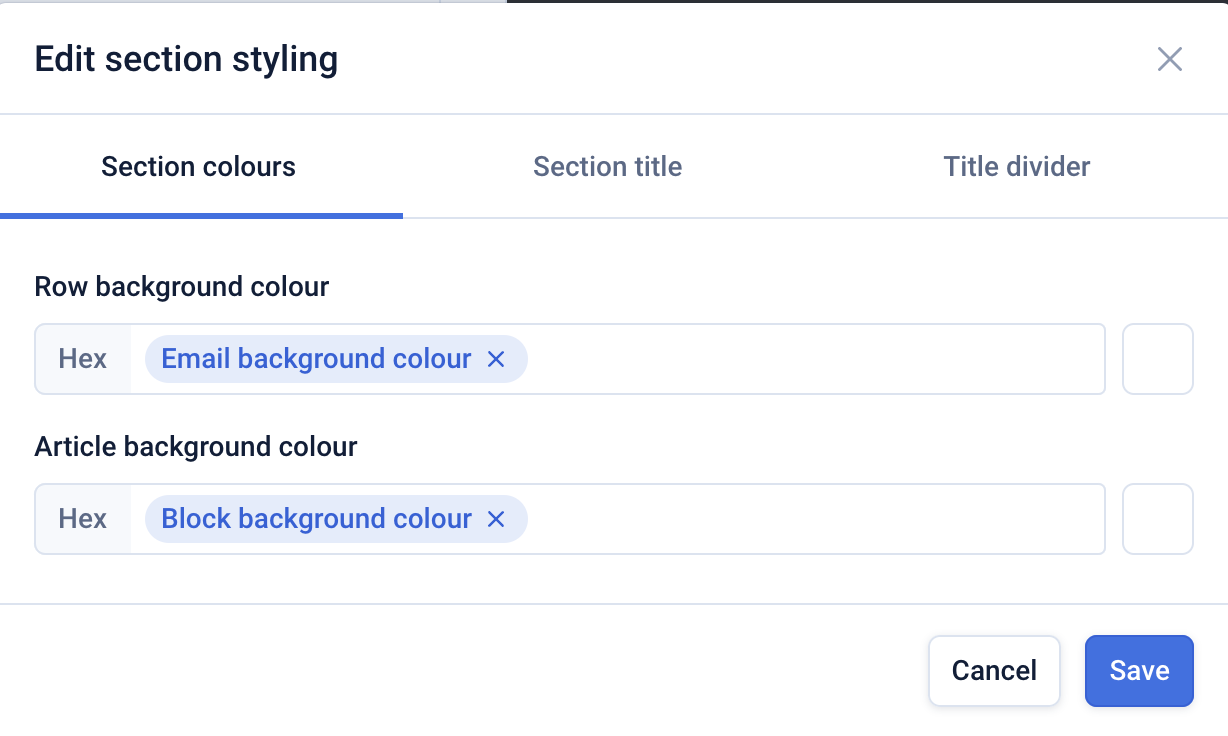
Section styling refers to the section colours, title and title divider. To style the article section, open the 3-dot menu and click ‘Section styling’.
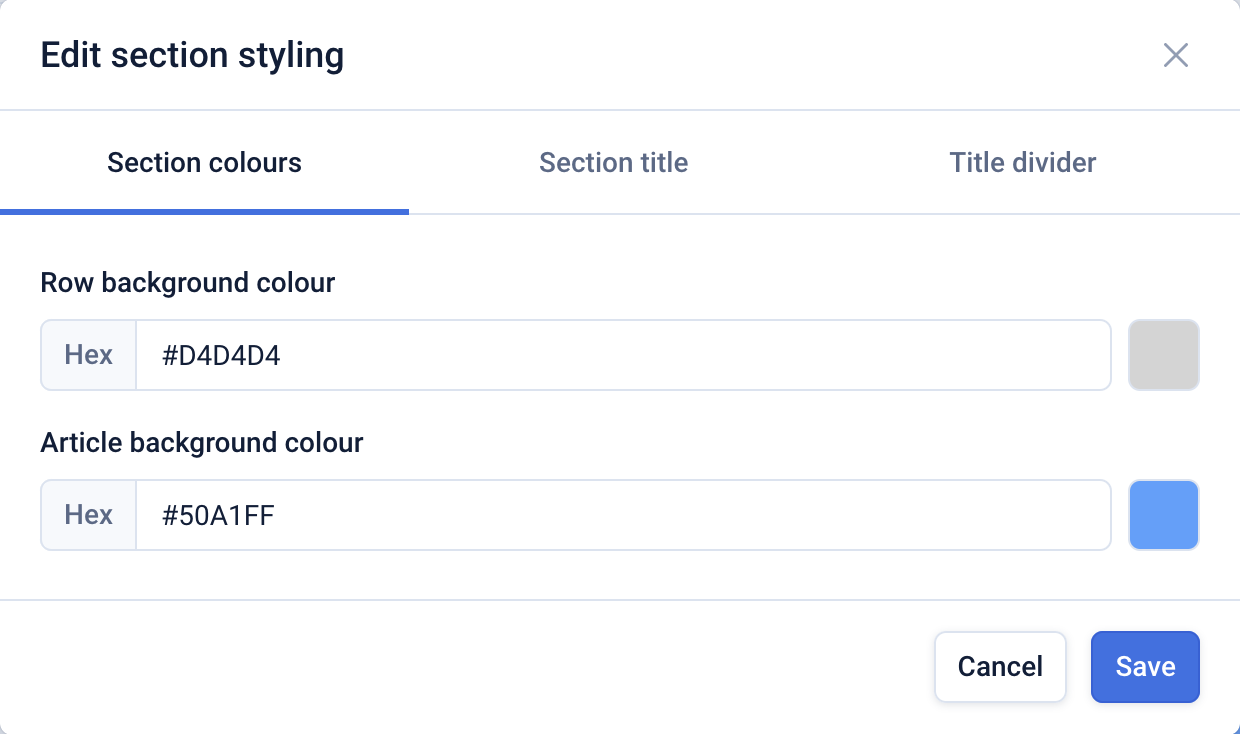
Section colours
You can apply colours to the row background and the article background by clicking on the colour swatch on the right-hand side, selecting a desired colour and clicking ‘Save’.
The presets for ‘Email background colour’ and ‘Block background colour’ can be defined by navigating to Settings > Campaigns > Campaign Name > Branding > Edition.
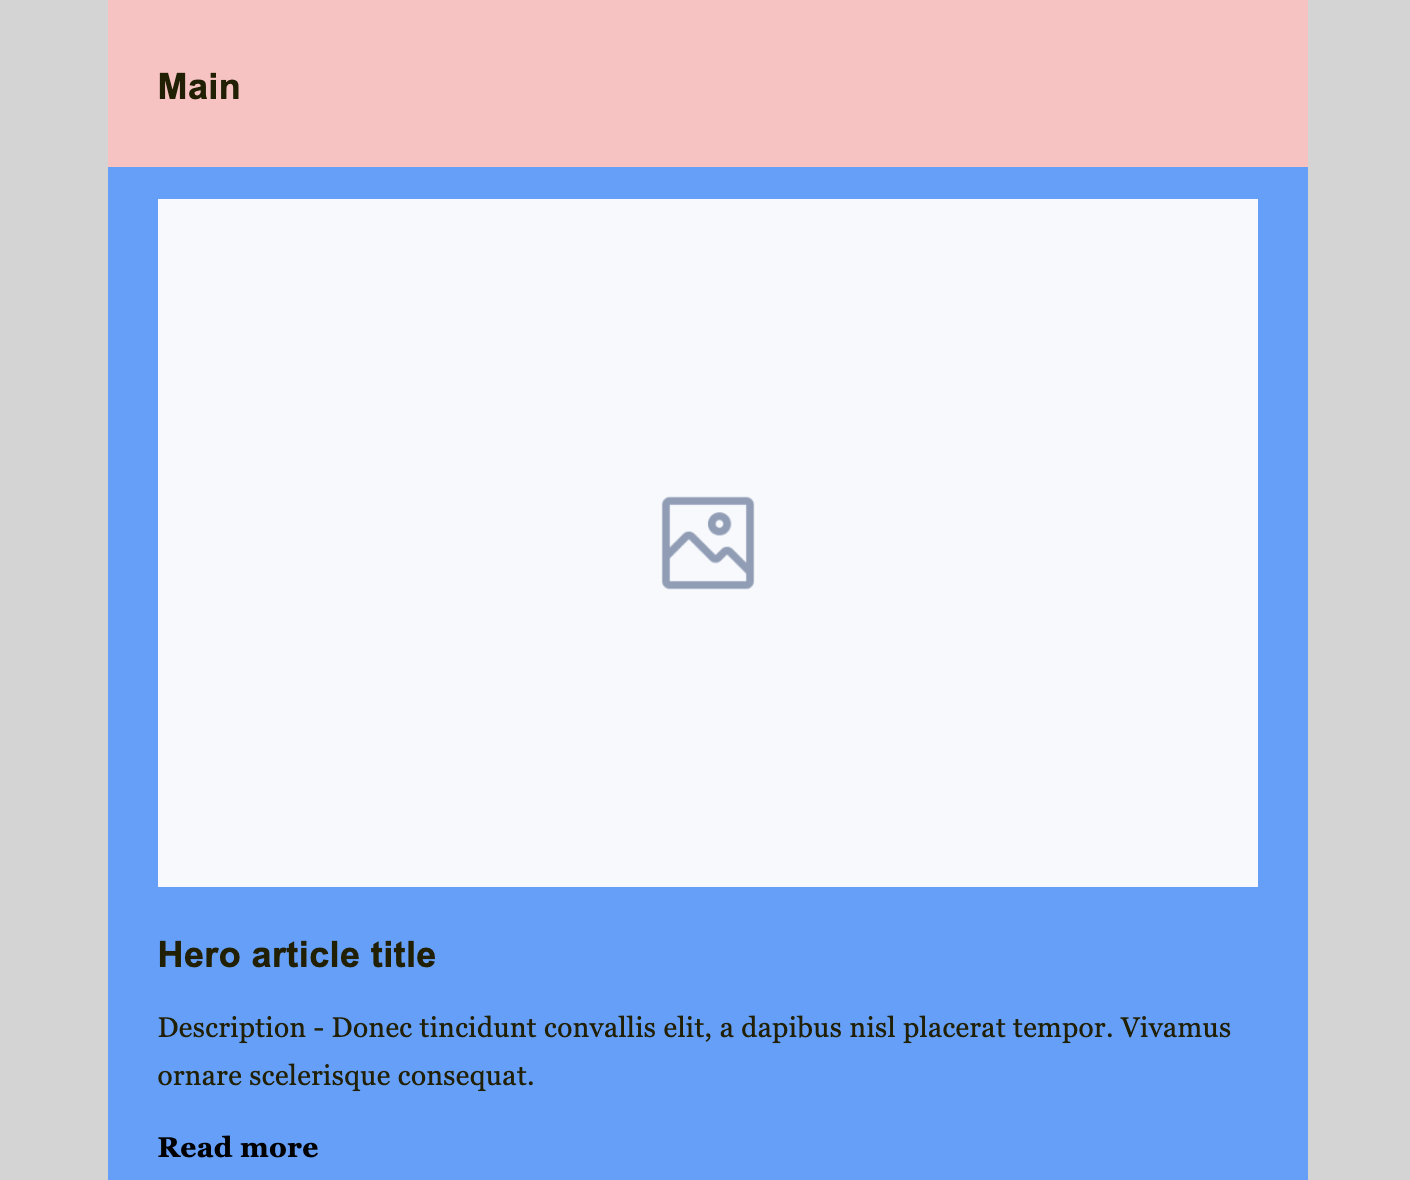
The example article block example below displays the grey row background and the blue article background.
Section title
The ‘Section title’ tab refers to the title of the article section. Here you can modify the font styles, alignment and the colour of the text and the background colour of the header (see the pink background in the example above).
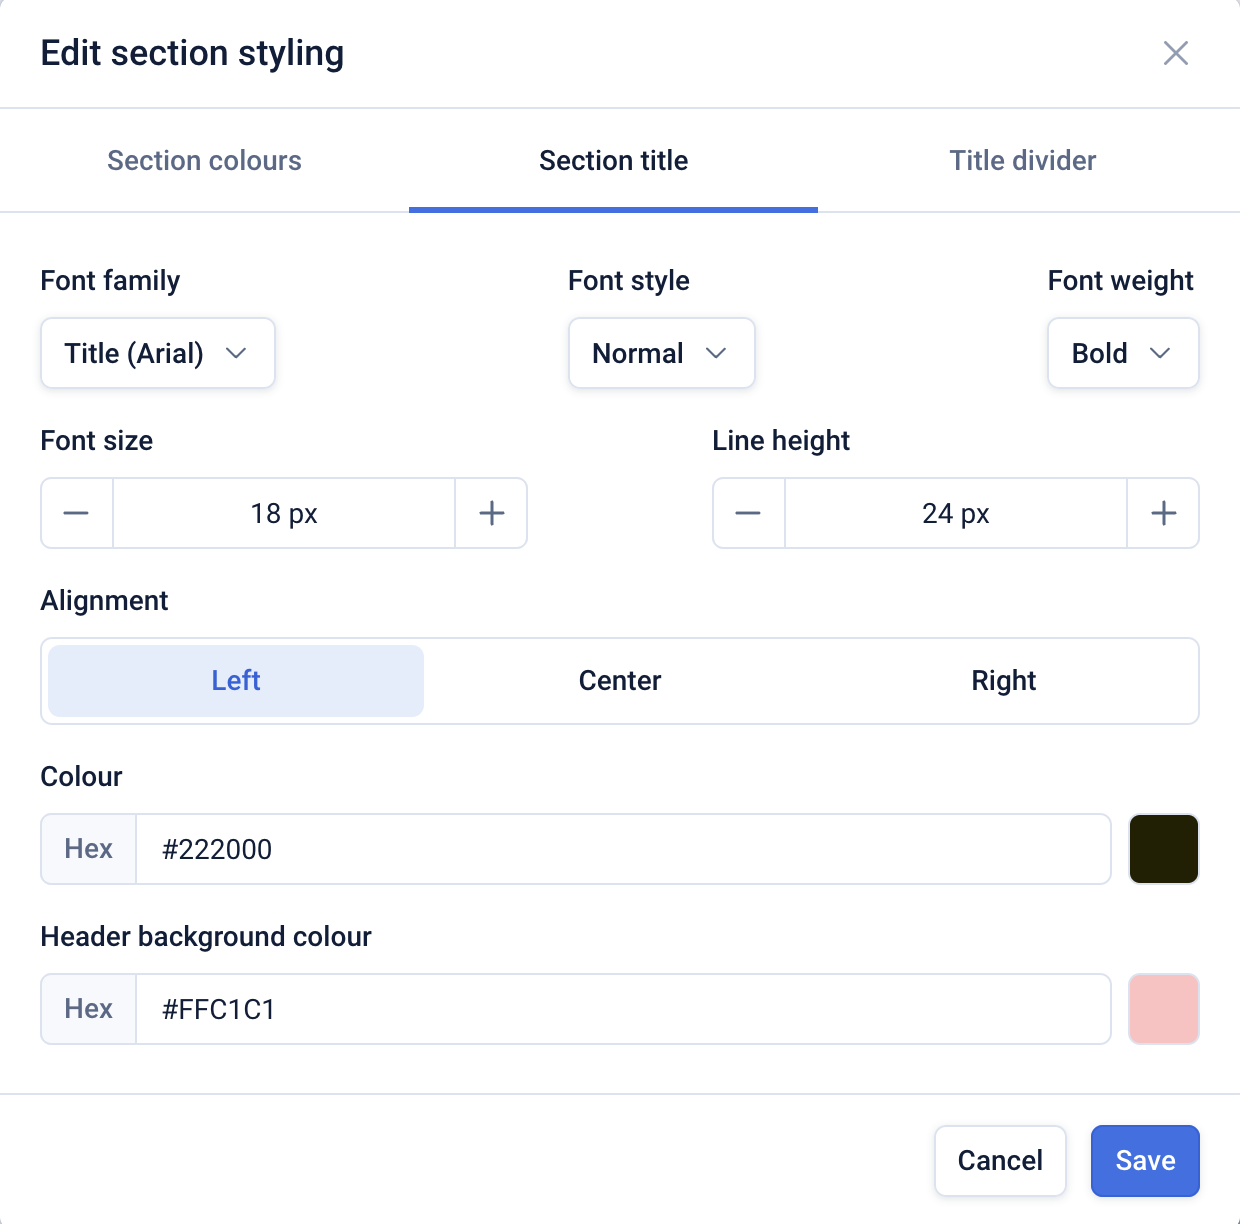
You can select either the title or body fonts that are configured in Settings > Campaigns > Campaign Name > Branding > General styling > Fonts.
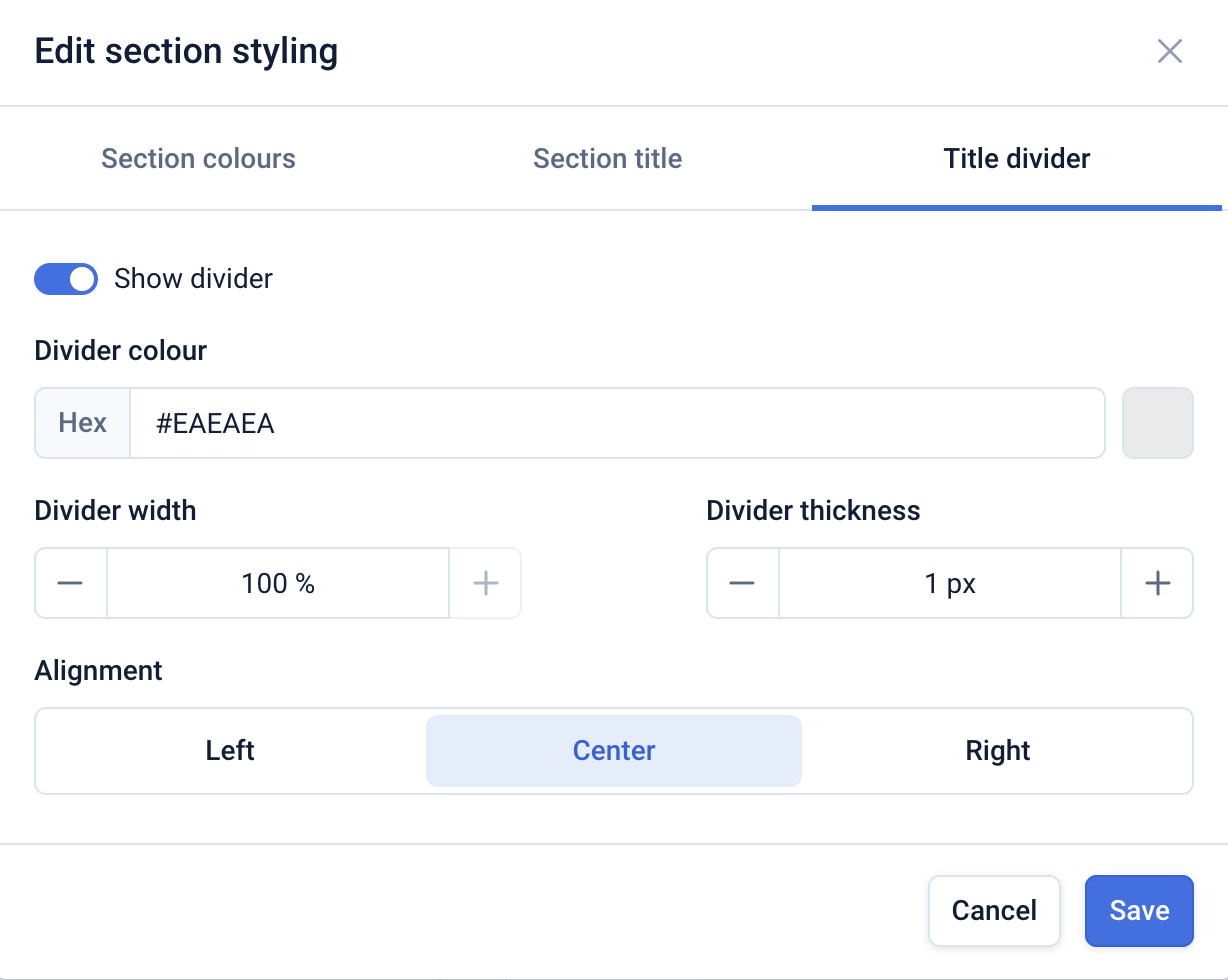
Title divider
A title divider is a dividing line between the section title and the articles. On this tab you can toggle on or off the divider display and configure the colour, weight, thickness and alignment.
Styling the articles
Article styling refers to settings that alter the display of the article title, description and CTA. The article CTA refers to the button or CTA text e.g. ‘Read more’, that you can configure on the ‘Content’ menu.
To modify the article styling click on the 3-dot menu for the articles block and select ‘Article styling’.
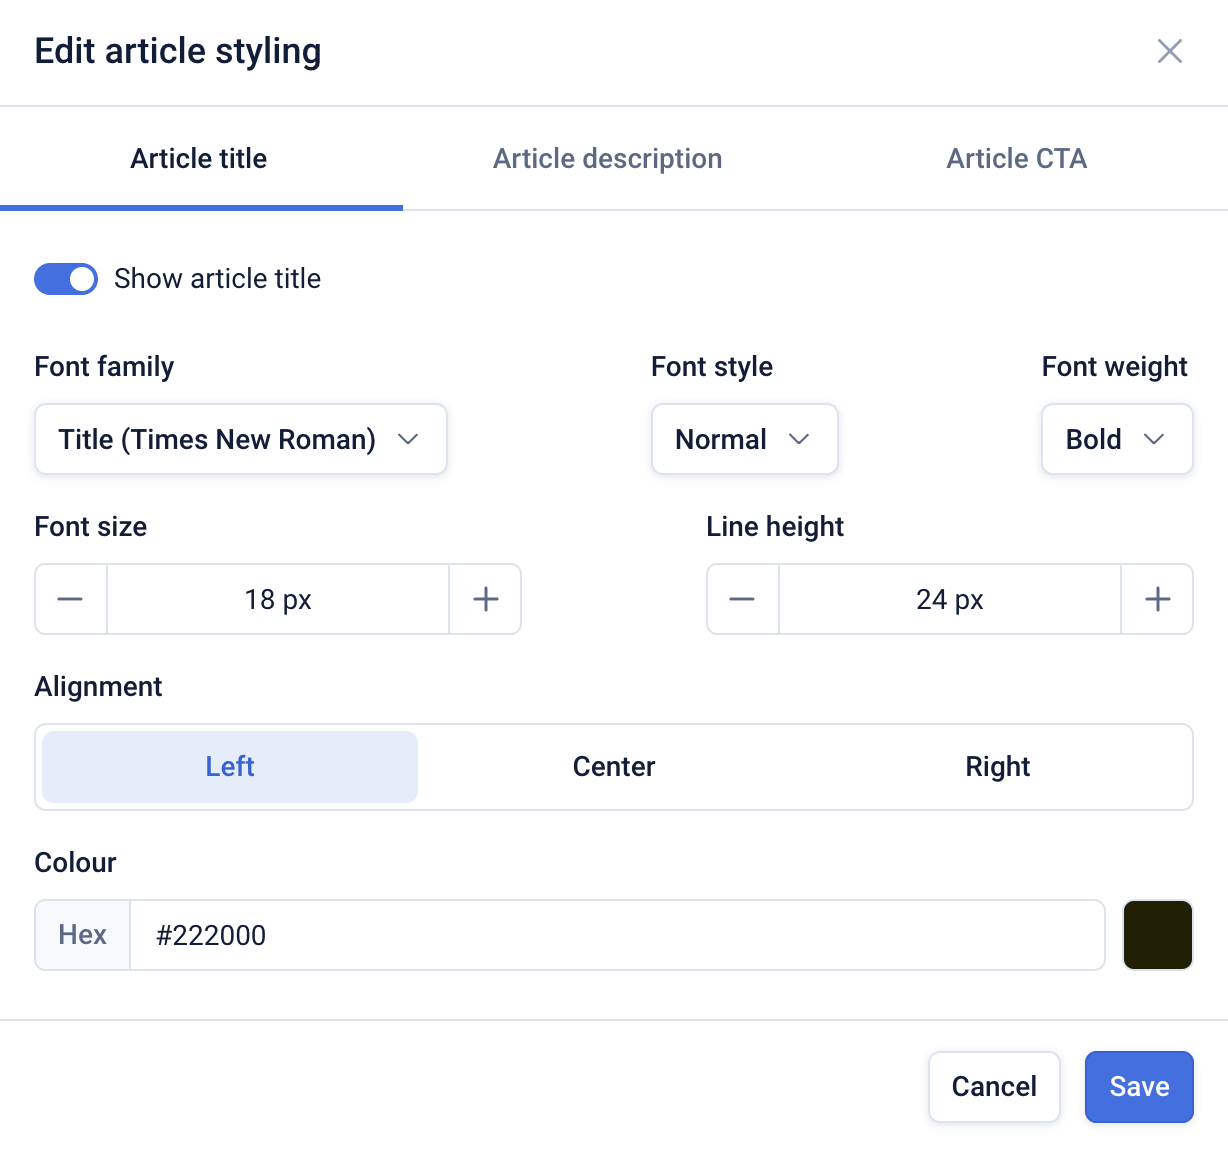
Article title
On the ‘Article title’ tab you can toggle the display of the article title on or off. You can also configure the title font style, size, alignment and colour.
Article description
On the ‘Article description’ tab you can toggle the display of the article description on or off. You can also configure the description font style, size, alignment and colour.

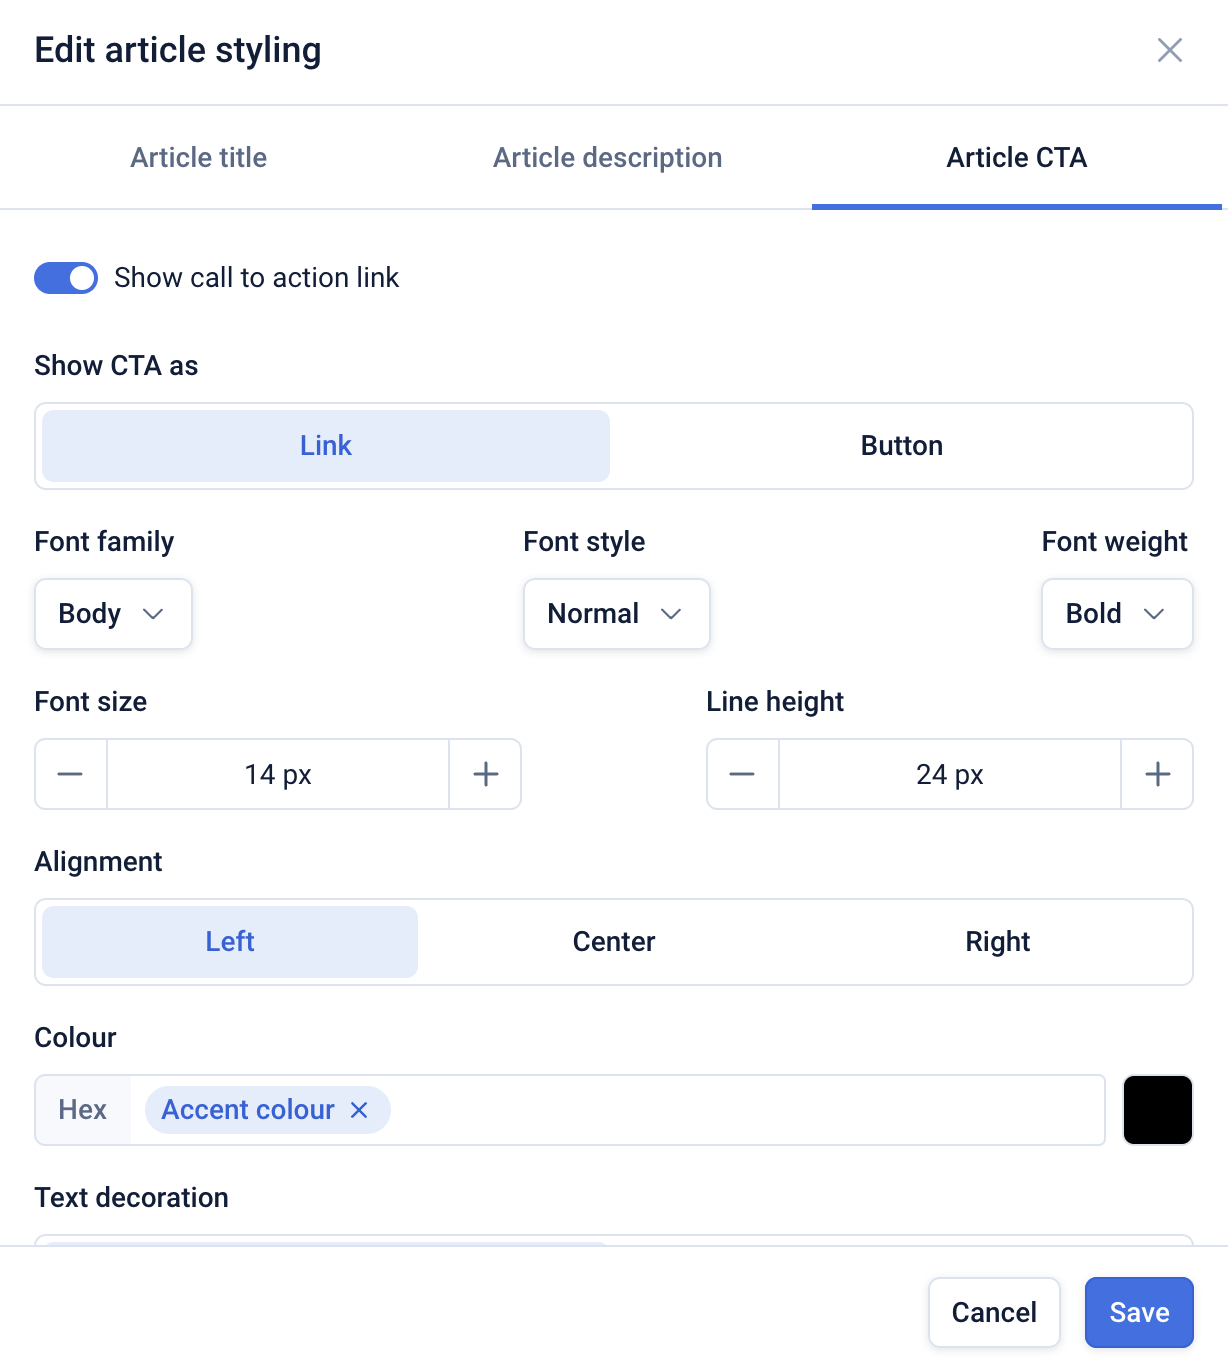
Article CTA
The article CTA refers to the button or CTA text e.g. ‘Read more’, that you can configure on the ‘Content’ menu.
On the ‘Article CTA’ tab you can toggle the display of the article CTA on or off. You can also
configure the CTA font style, size, alignment and colour.