Personalized Greetings
Personalized greetings are an excellent way to connect with your audience and make the content of your emails stand out. Emails with any form of personalization can increase click rates by up to 139% , heavily increasing subscriber engagement.
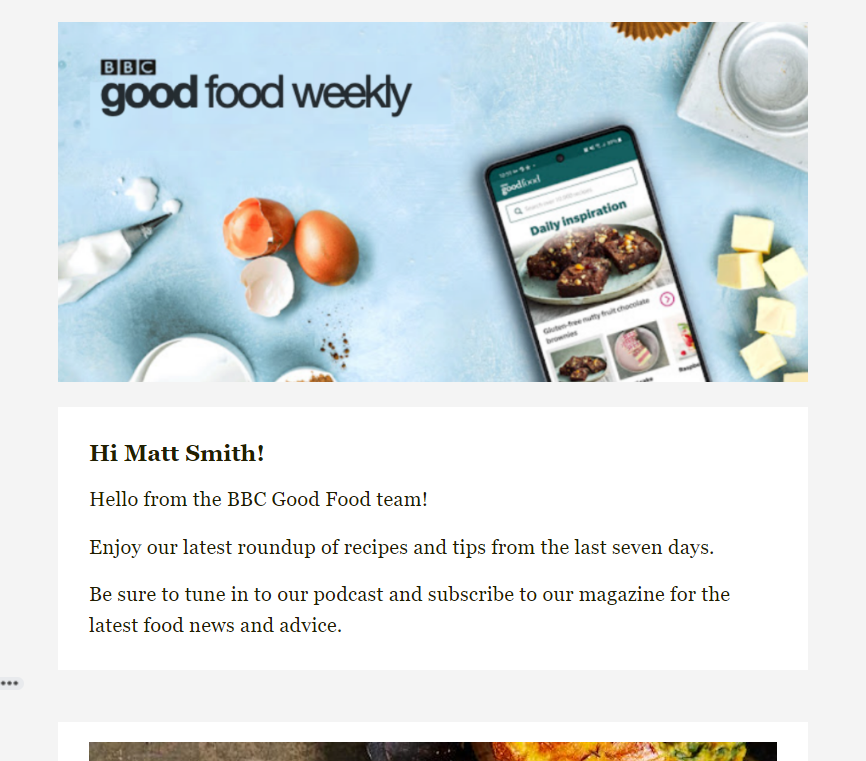
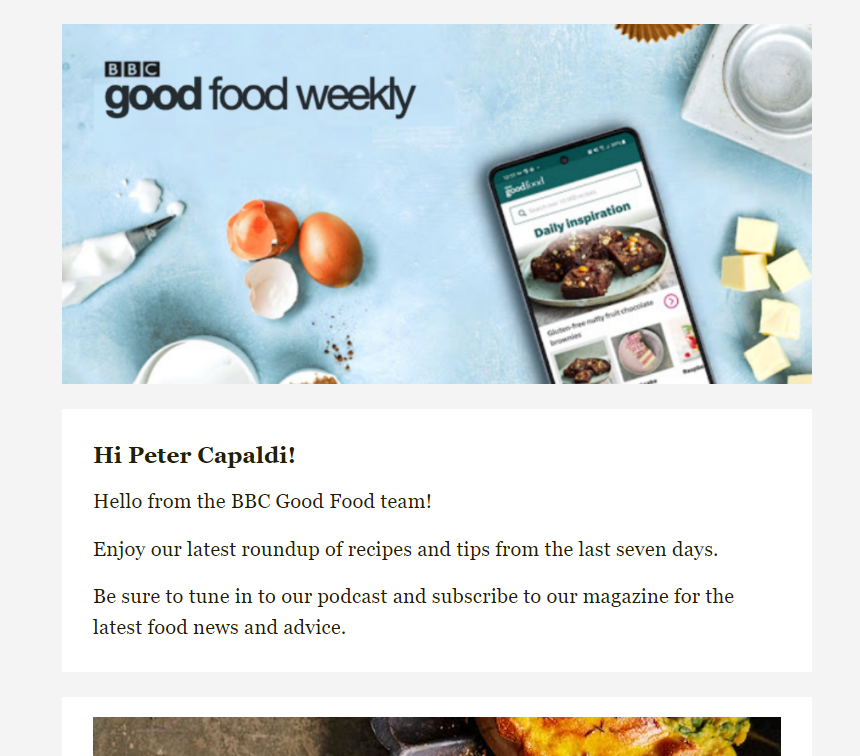
Echobox allows you to insert your subscribers’ first and/or last names in your emails if you have collected that data.
Collecting Subscriber Data
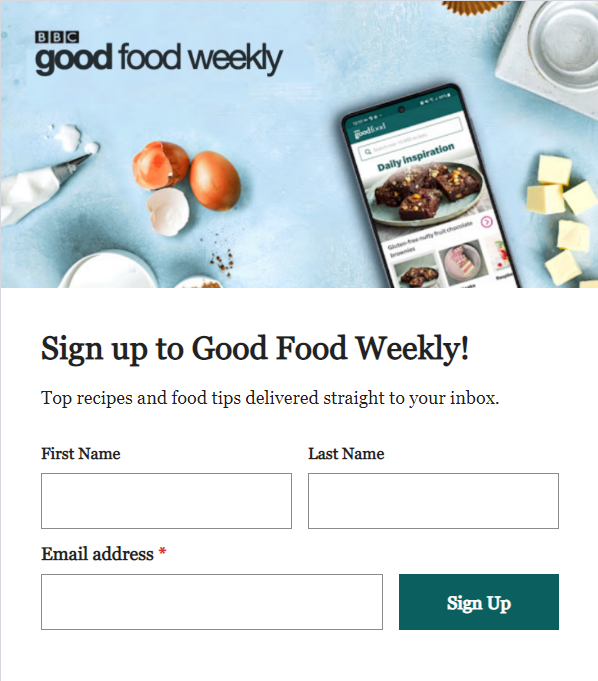
In order to use personalized greetings with Echobox, you first need to record your subscribers’ first and last names. If you have been using a sign-up form (either hosted by Echobox or your own) that contains your subscribers’ first and last names, then you should already have this information. Alternatively, if you have the data in a CRM or other platform, a bulk upload can be performed to update each subscriber. It’s also possible to set a fallback value, to cover instances where you don’t have the data.
Adding first and last names to your signup form
To add first and last name fields to your sign-up form go to Settings > Campaigns > All Campaigns > Branding > General styling > Sign-up section, and check the First and last name box from the options on the left.

Any new subscribers will be asked to enter this data when they sign up to your newsletter.
Bulk upload
If you have your subscribers’ first and last names stored elsewhere (or have subscribers who signed up before you started collecting first and last names), then you can add that information to your subscriber list by uploading a new CSV of your subscriber list containing their email addresses, first names and last names.
Here is an example of a CSV with first and last names.
To upload your new list, go to your Campaign Dashboard > Manage subscribers > Add > Upload CSV, and place your CSV file in the menu that pops up.

Personalizing different types of Editions
Optimized
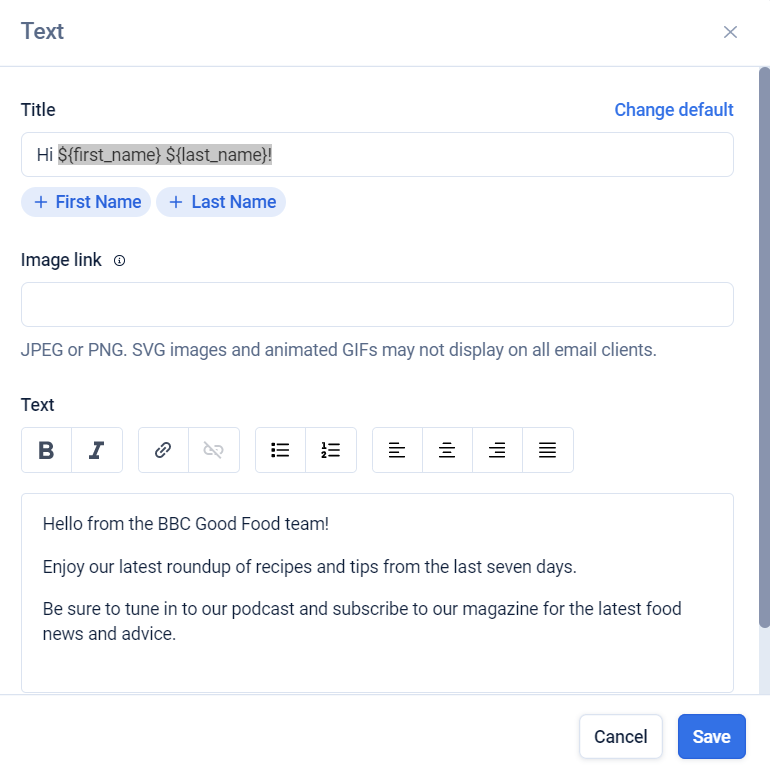
First and last names can be placed in the title or main body of an Edition’s text block. This can be done by accessing Settings > Campaign > Content > Body, and then clicking the appropriate buttons in the text block. Your subscribers’ names will then be automatically inserted where you have specified in future Editions.
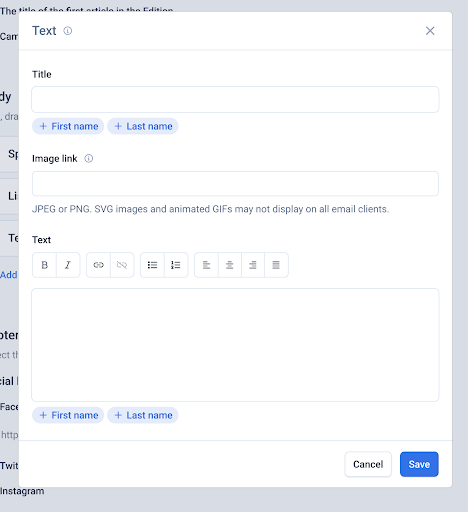
This can be overridden on the Curate Page by deleting ${first_name} and ${last_name} text in your Edition.
Custom: HTML
First and last names can also be placed in the body of an HTML email by clicking on the same buttons above the HTML field. This will place them where you last clicked within the HTML body.
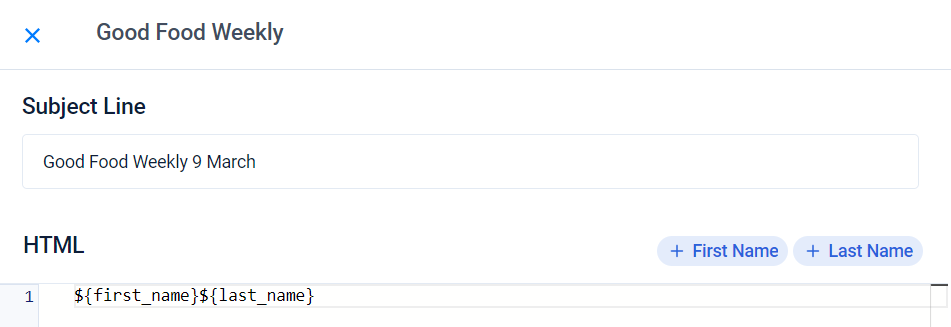
First and last names in the HTML field
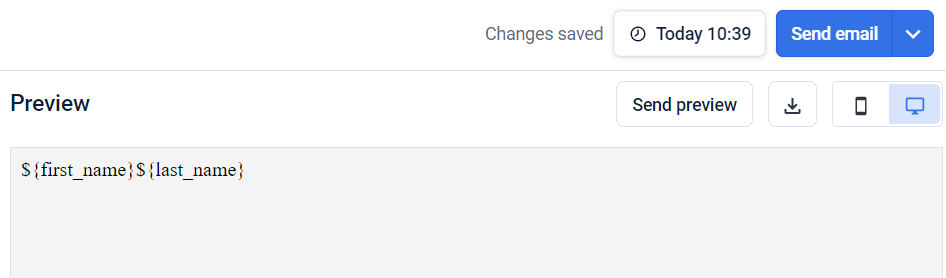
First and last names in the HTML preview
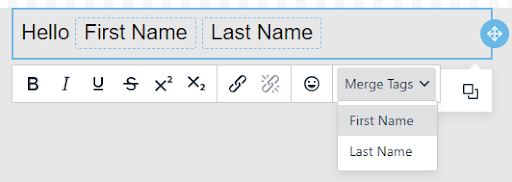
Custom: Drag & Drop
For Drag & Drop emails, first and last names can be added to any heading, text or button block.
To do this, you will need to select the Merge Tags dropdown and then choose the name you want to add.
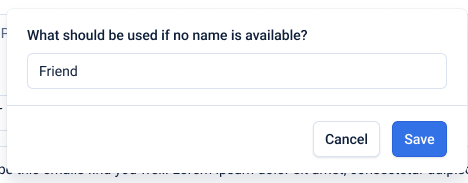
Setting a Fallback
In all these cases, you will be asked to set a fallback name for when a subscriber’s name is not available. You can choose to leave this blank, in which case no value will be included, or set a default value, e.g. “friend”