How to configure a multi-step welcome series
How to configure a multi-step welcome series
Configuring the first journey step
Adding a delay between journey steps
Configuring the second journey step
Summarizing the welcome series journey
Overview
Journeys allow you to create tailored email experiences for your subscribers based on data specific to individual subscribers such as their sign-up date or engagement level.
Journeys can involve multiple steps, delays and criteria which means journeys can be flexibly configured to allow subscribers to enter only at the first step of the journey or part-way through.
You can use journeys for a variety of use cases such as:
- Welcome series to welcome new subscribers to your newsletter and build subscriber loyalty
- Re-engagement journeys to remind subscribers who are engaging less frequently of the value of your newsletter
- Upsell journeys to nudge engaged subscribers to a premium subscription
- Journeys for a future date such as a subscription anniversary or birthday to build subscriber loyalty
How to configure a multi-step welcome series
Creating a journey comprises 3 basic steps:
- Create the email templates for the journey
- Configure the send schedule
- Configure the journey steps
Creating the welcome emails
Navigate to the template editor and use the drag-and-drop builder to create your welcome emails for each step of the journey.
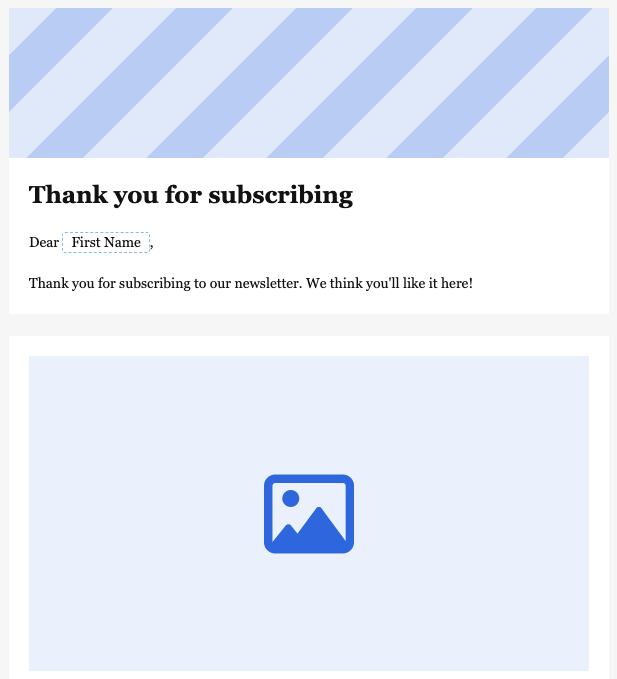
You can use merge tags to add personalisation such as the subscriber's first or last name.
Save the template, and give it an appropriate name such as Welcome email 1.
Configuring the send schedule
After creating the templates for the journey navigate to the journeys dashboard and click ‘Create new’. Here you can enter a unique name for your journey.
The frequency selector denotes the days of the week the journey will run. Journeys can run once a day.
For a welcome series, you will likely want the journey to run every day so that new subscribers receive the first email within 24 hours of signing up.
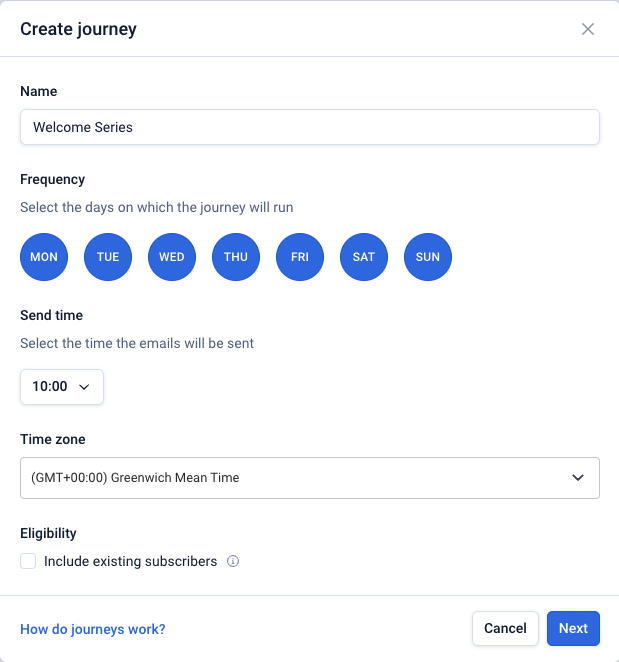
For a welcome series, we’ll want to ensure that existing subscribers cannot be included so the ‘Include existing subscribers’ checkbox should remain unchecked.
You can also select the send time and the time zone of the sender (not the recipient). Currently, send time optimisation is not available for journeys.
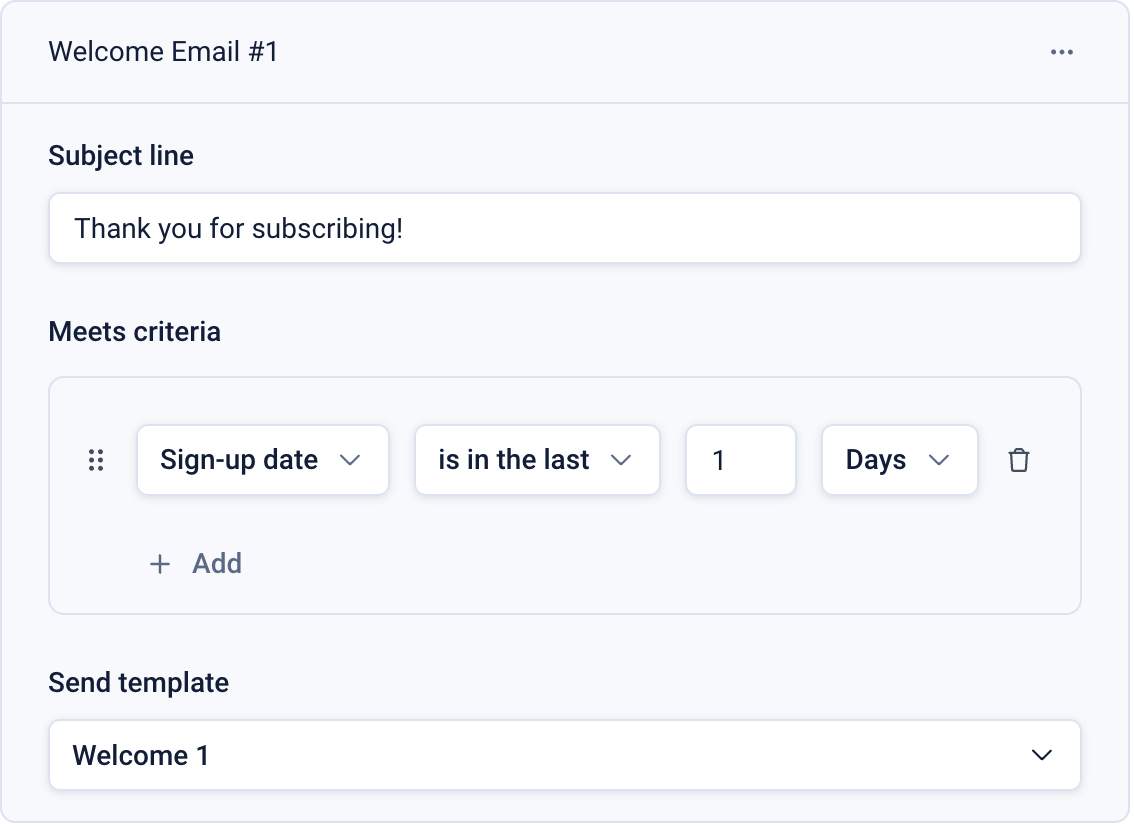
Configuring the first journey step
After clicking ‘Next’ you can configure the first step of the journey.
Click the 3-dot menu on the step to rename the step (if required, this label is shown on the dashboard and might help when reviewing per-step analytics) and enter the subject line for the first step.
The ‘Meets criteria’ section allows you to specify the criteria that will qualify subscribers for entry into the journey. In this example, subscribers who have signed up within the last day will qualify.
The ‘Send template’ section allows you to select the template that will be sent as part of this step.
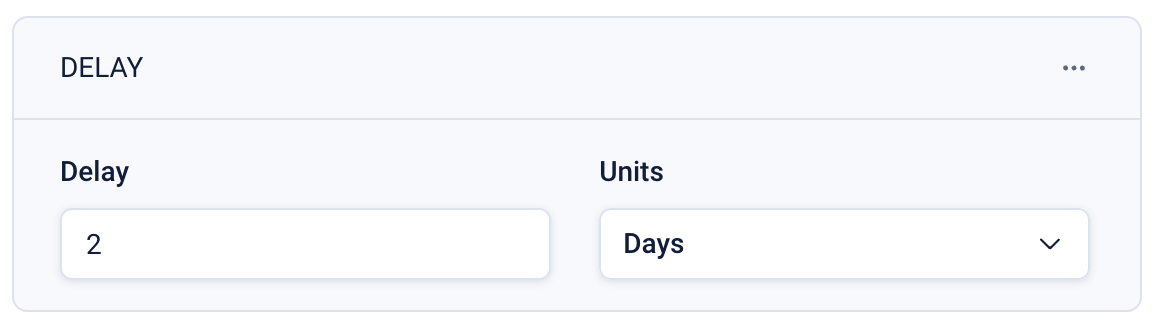
Adding a delay between journey steps
After each step, you will be able to add an additional step or add a delay.
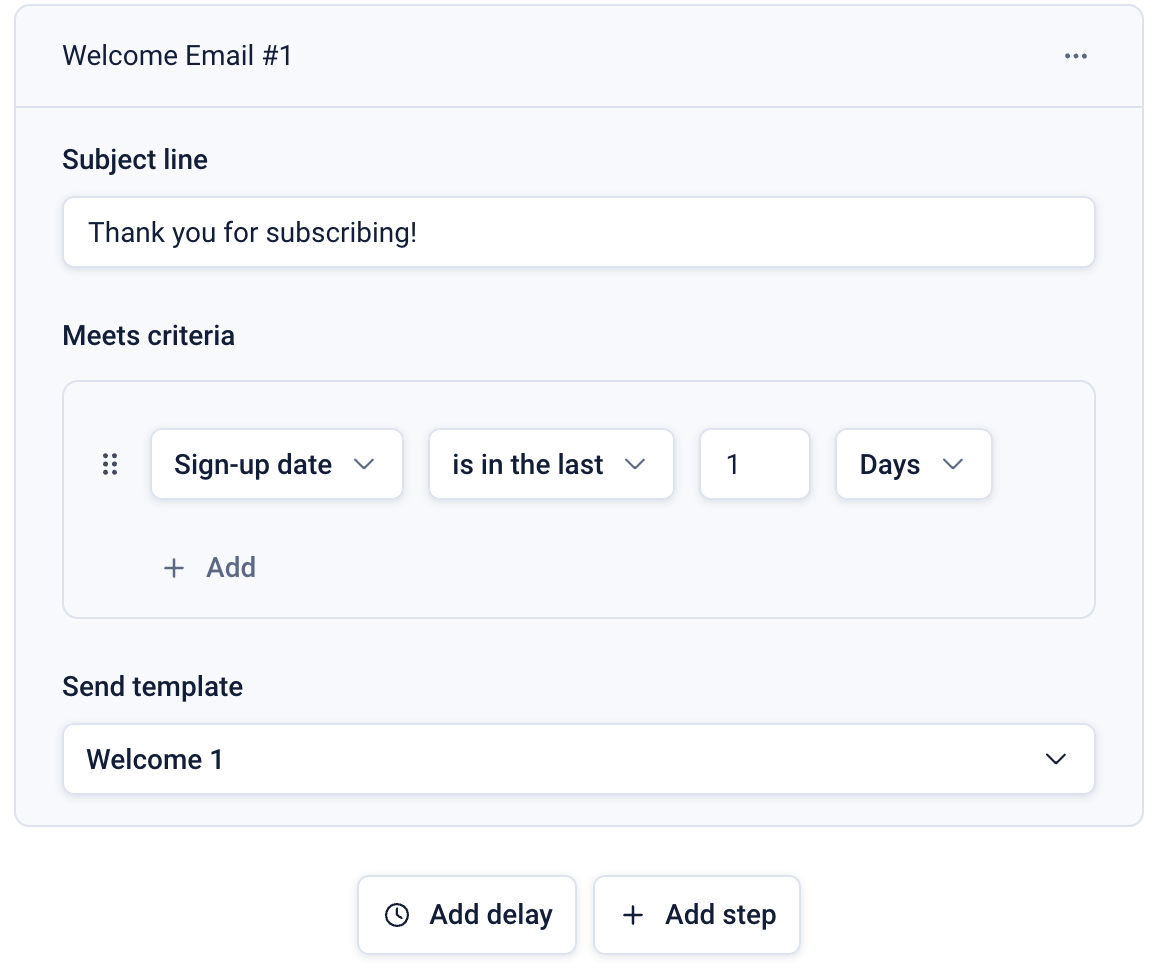
Here we’ll add a delay of two days before emailing the new subscriber again as part of the journey.
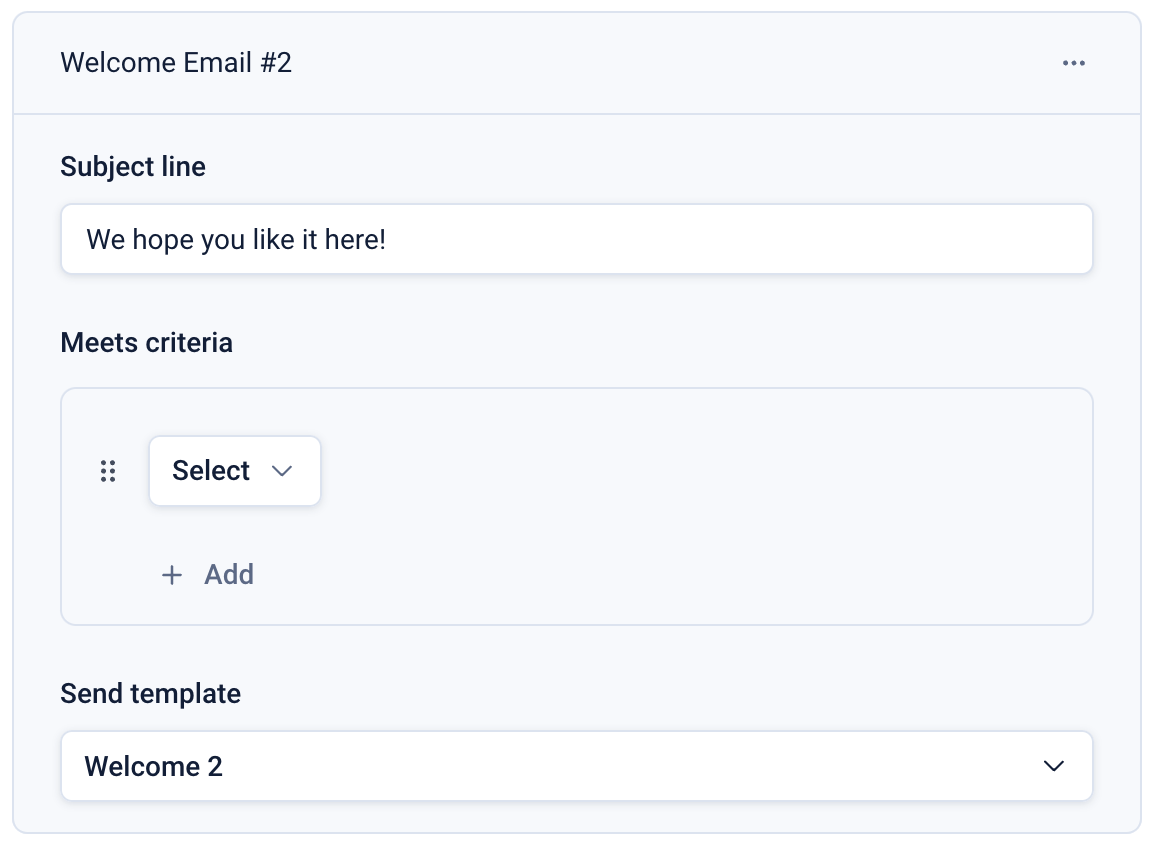
Configuring the second journey step
For the second step, the second subject line has been added and the second welcome series email has been selected.
As this is a welcome series and we have already specified the criteria that start subscribers on the journey, the ‘Meets criteria’ section in the second step is left blank.
Summarizing the welcome series journey
For this welcome series example, the journey will send emails every day at 10am to any new subscribers who have registered in the past 24 hours.
If a subscriber signs up on a Monday they will receive the email of the first step in the journey on Tuesday. Thereafter, the two-day delay will take effect, and they’ll receive the second email on Friday before exiting the journey.